One of my hobbies is Hi-Fi. While I have most of my music on digital formats I do get a great deal of pleasure restoring old turntables. One of the challenges when buying a second hand turntable is to check the wear on the stylus as it can damage your records.
I thought that it would be a simple mater of using my macro lens, but I was sorely mistaken. The problem is that the stylus tip, really is VERY small. As photographers we are used to seeing amazing closeups of insects for example, but this is like trying to take a photo of the end of the insects antenna!
Here is the story…

A Shure* Fire Method to Check Your Stylus.
Shure, the famous cartridge maker, has a tried and tested method for checking stylus wear. This approach is much better than the many methods suggested on the web, such as recording how many albums you have played, or changing every X years. It ideally requires a microscope and two strong lights. I have tried two methods.
- Expensive option – DSLR with extension tubes and close up lenses and a couple of studio lights
- Cheap option – USB Microscope (£10-20) and light provided by two led torches – I used my iPad and iPhone but any LED torches will do.
Shure’s method reads as follows…
“Look directly down on the stylus tip. Illuminate the stylus from each side. As the stylus wears, flat spots are created. These flat spots will reflect light up into the eyepiece. A worn stylus will look like two cat eyes staring at you. See the PDF document attached below.”
This is the result – Technics 310MC with “Cat’s Eyes” visible – a worn stylus, no surprise it is 35 years old!

The shape of these two highlights varies according to wear and type of stylus. Shure’s handy guide has pictures showing how to compare your stylus with new, worn and very worn styii.
The size of these highlights will of course increase as wear increases. It is somewhat subjective to decide what size of highlight from the flat spots means that they have reached a point where the record is being damaged! I decided to compare new somewhat used and worn styli.
Here are pictures of a very worn Technics 310MC and a Dynavector 10×5 High Output moving coil. Both are taken at the strongest magnification possible and focused as best as possible on the light spots. Note that the 10×5 has a considerably thicker cantilever than the extraordinary boron tube Technics.

Note the distance between the highlights is about the same (as you’d expect as that is determined by the record groove width) but the highlights on the Technics stylus are much larger than the Dynavector, which has seen little use
Setup 1 – DSLR, Extension tubes, Macro Lens and Closeup Filters.
The stylus is fixed via it’s screw hole with a cable tie to a stapler – Heavy, stable, and angled, idea for what I needed. Two strong lights are placed at either side. Two LED torches would suffice. In this case I have used studio lights with a grid. Ideally these would be identical, but I had a snoop and a larger grid, so that is what I used see below. The briefcase was used to give bring the stylus up to above the minimum height of the studio lights.

The camera, a full frame Canon 5D mk4 has 3x Kenko extension tubes and 3x SRB closeup lenses on a Canon L 100mm f2,8 Macro lens. The lens by itself provides no where near enough magnification. The tubes don’t effect image quality but the close up lenses certainly do! (reducing resolution significantly) Perhaps a bellows would be a better solution? (Clearly nobody would buy this setup for the purpose of checking styli as it’s over £3k for this kit – but I had this anyway so thought I might as well try it!)

A focusing rack makes like much easier. I focused with the rack rather than with the lens, I fixed the lens at it’s closest focussing distance and moved the camera back and forth to focus using the knurled wheel on the rack. I experimented with f8-f32, varying the strength of lighting for correct exposure, I found f22 to be optimum combination of sharpness and depth of field. The final image above in B&W is the result of three images focus stacked in Photoshop. The depth of field at this magnification appeared to be less than a mm.

I also tried reverse mounting a 50mm lens on the front of the 100mm Macro lens but this was worse than the closeup filters as the magnification was too low.
Setup 2 – USB Microscope Method
This is one of the cheapest USB microscopes you can find online. ( I found it for £11.99!) I downloaded “Digital Viewer” software – see screenshot. This camera only has a resolution of 640×480 or 0.3Mp (compared to 30MP of the Canon DSLR) but because it has massive magnification – up to 500x it is enough to show stylus wear very clearly. It took a few minutes to setup. It is tricky to align as the direction of movement on screen is opposite to how you move the scope. The best way I found was to move the microscope back and forth to focus – no luxury of a focussing rack here! I note that some of these types of USB microscope come with a table and rack – I’d recommend that, the stand on this is flimsy and once you loosen off the tension it flops in all directions making small adjustments very difficult and rather frustrating. The grey ribbed dial is magnification, not focus – you will find that small changes to the magnification result in the need to move back and forth through several iterations to find focus again.


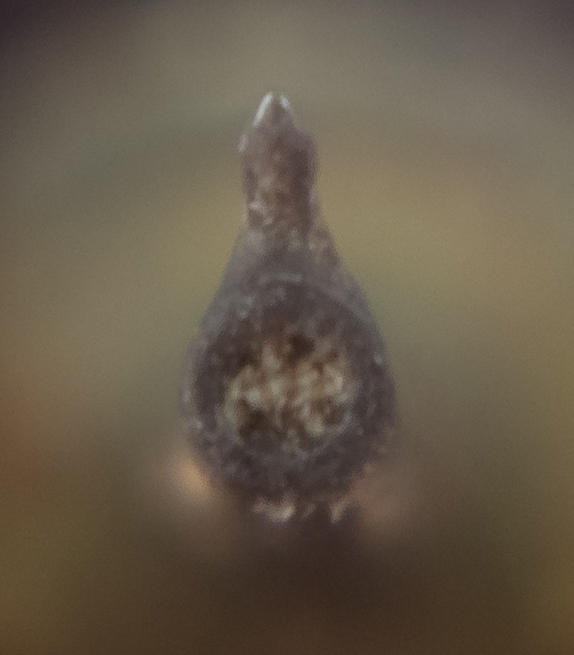
Here is the “Cat’s Eyes” image from the Microscope. – pretty clear, two tiny dots of light on each side of the stylus tip. Much easier to obtain than with the DSLR

At a lower level of magnification the “Cat’s Eyes are still clearly visible.

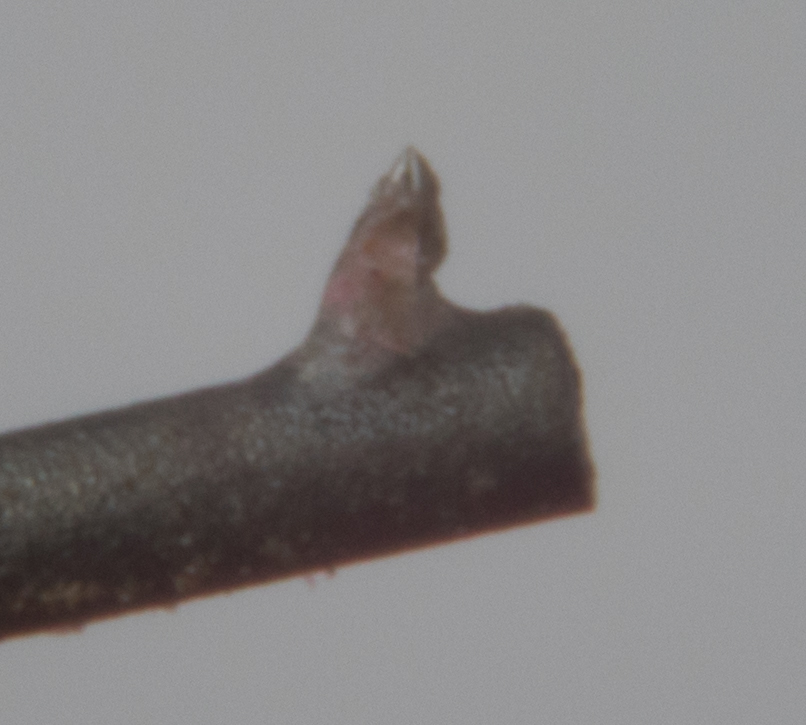
I decided to try some side images and see if I could highlight the oval shaped flat spot where the stylus has worn from the side. The combination of the USB Microscope and the strong LED, made it easy to find on both sides. I used the time lapse function so that I could keep my hands for holding the “torches”.
Looking at the sides of the Technics and moving the light around to highlight the flat spot gives a large area of wear.


I couldn’t obtain any flat spot area on the Dynavector.

Conclusion
Overall I am pleased with the images, though not the result, my Technics 310MC will need re-tipping!
The images from the Microscope are low resolution and very noisy but are still easily able to identify stylus wear for a very low cost. Highly recommended as a purchase to check your stylus – from £12, but I’d recommend one with a rack and stand like this…

For the DSLR a bellows attachment is likely to provide sharper images with higher resolution, but a completely unnecessary expense for the purpose of this exercise, a USB microscope costs much less than a bellows attachment, even if you do already own a DSLR and macro lens.
I hope this is helpful.
Other images taken with DSLR camera setup.
Technics 310MC

Grado Gold V2

Realistic Shure RXP3

